

I recently set up my business website on WordPress. Due to budget constraints, WordPress was the perfect solution because it is free. I installed all the latest required software since my website runs on a hosted virtual machine at Netbrio. However, starting day one of going live, I noticed the log files filling up with brute force attacks into the control panel.
The number of attempts was alarming, and I had to do something to mitigate it. I looked into installing plugins such as WordFence. However, I was uncomfortable with these malicious packets hitting my server. I needed something to block this at an application level outside my hosting environment.
This is where Cloudflare comes in. Cloudflare has a feature called WAF that does exactly what I was looking for: deep packet inspection and the option of blocking a URI (a path such as /wp-admin). Cloudflare’s free account allows for 5 WAF rules, which is more than enough for me. I also turned on a few other features of Cloudflare, but to keep this simple, this article covers creating WAF rules. I will have other articles covering the other features of Cloudflare.
I needed the following out of Cloudflare: I have 3 locations from which I would access the WordPress Management UR (which I will call https://www.domain.com/wp-admin). The goal is to block access to the management portal to all IP addresses except for the 3 locations I connect from. Also, leave www.domain.com open to the world.
Now, the challenge was documentation. I could not find any easily understandable documentation on how to do this. Once I got this working after several trials, I decided to document it to make it easy for others to follow.
Here are the steps I followed. As mentioned earlier, let’s call my website www.domain.com and the management portal for my website www.domain.com/wp-admin. The safe IP addresses I will be connecting from are
Home – 172.168.10.11
Work – 10.10.10.11
Work 2 – 198.168.10.11
(The above IPs are only examples and not my IP address)
The abbreviation WAF stands for Web Application Firewall. In order to use Cloudflare’s WAF service your DNS Name server has to be hosted with Cloudflare. DNS hosting is a free service offered by Cloudflare. Fortunately, that process is straightforward. In this section, I will go over it and show you how to connect your domain and, consequently, website to Cloudflare so it can benefit from its services.
Configure a Domain With Cloudflare
Like many other online services, you must create an account before using Cloudflare. Head to their sign-up page at www.cloudflare.com and follow the steps. Now that you have an account, the next step is to log in. If you did not automatically log in after the registration, go to the login page and enter your details. Once in, you will see the homepage for your dashboard.

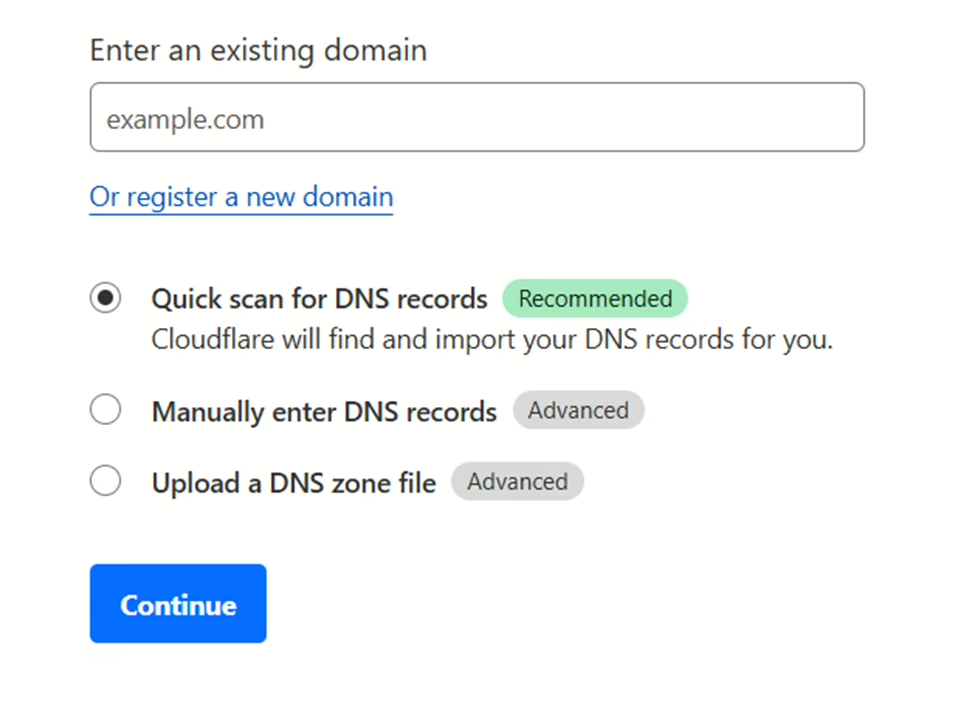
This is where all your websites appear when you add them. It is currently empty because you have not added any. Click the ‘Add Domain’ button at the top right to begin the process on the next page. Type in your domain name (not the website, so without https:// for our example, this will be domain.com. Yours will be different) and leave the DNS options on Quick Scan. Click Continue to proceed.
On the next page, select your plan. The Free one is at the bottom, and it is the one most people use. It will be more than sufficient for most everyday users. The premium plans offer more specialized options that not everybody uses. For our purposes, we will use the free plan.
After clicking Continue, you will be taken to Cloudflare’s automatic DNS scan when you choose Quick Scan. As the name suggests, Cloudflare will check and import your domain for its current DNS records, saving you the trouble of doing it yourself. Please heed the warning at the top of the page and double-check the records, just in case. If you notice anything missing, add them by clicking + Add Record. You can also edit a record by clicking on it directly. When ready, click on Continue to Activation.
Next, you must change your domain’s Nameservers to connect it to Cloudflare. The page has some instructions on how you can do that, but the short of it is you must log in with your account on your Registrar’s website. From there, follow their process for changing the Nameservers. This page also has the Cloudflare name server information you must port to your registrar.
Copy the Nameservers Cloudflare provides and replace the current ones on your registrar. The order does not matter as long as they are both present. When all set, click Continue. Confirm that Cloudflare has a DNS entry for your website and Proxy is turned on for this entry.
Please remember that changing Nameservers can take up to 48 hours to propagate fully through the Internet. Simply put, the change will take some time to go around the world so that all Internet providers can cache it and serve it to their customers. Cloudflare typically reduces that period, but you should still give the change time to take full effect. You can use a website like DNSChecker.org to understand how the propagation is progressing.
Create WAF Rule
Now that your domain name server has been transferred to Cloudflare, here is how I set up my WAF rule.
Log into Cloudflare dashboard.
Click on ‘Websites’ found on the menu on the left
Click on your domain name in the main window
Click on ‘Security’ on the right and then click on ‘WAF.’
On the main window choose the ‘Custom rules’ tab
Click on the ‘Create rule’ button
Give the rule a name, any name that will explain what the rule is for.
Now click on ‘Edit expression’ and enter the following
(http.request.uri.path contains “/wp-admin” or http.request.uri.path contains “/wp-login.php”) and not (ip.src in {172.168.10.11 10.10.10.11 192.168.10.11})
Replace the above IP address with your IP address if in doubt go to whatismyip.com to find out your public IP address.
Choose action ‘Block’
Place at ‘First’
Click Save
At this point, your WordPress control panel is blocked from all IP addresses except the safe IP entered above.
Log into Cloudflare frequently to check the Security => WAF => Custom Rule page to see if any traffic is blocked. You can even use a VPN to test if the firewall rule blocks traffic to the WordPress management site.
Also published here.
Netbrio offers turnkey management for websites and cloud environments.